Основы стилизирования текста и шрифта — Изучение веб-разработки
- Обзор: Styling text
- Далее
В данной статье мы начнём путь к овладению стилизацией текста при помощи CSS. Мы подробно изучим основы стилизации текста и шрифта, такие как толщина, начертание, семейство, стенография, выравнивание текста и другие эффекты, а также рассмотрим междустрочный и межбуквенный интервалы.
| Необходимые знания: | Базовые компьютерные знания, Основы HTML (раздел Введение в HTML), основы CSS (раздел Введение в CSS). |
|---|---|
| Задача: | Изучить основные свойства и техники, необходимые для стилизации текста на веб-страницах. |
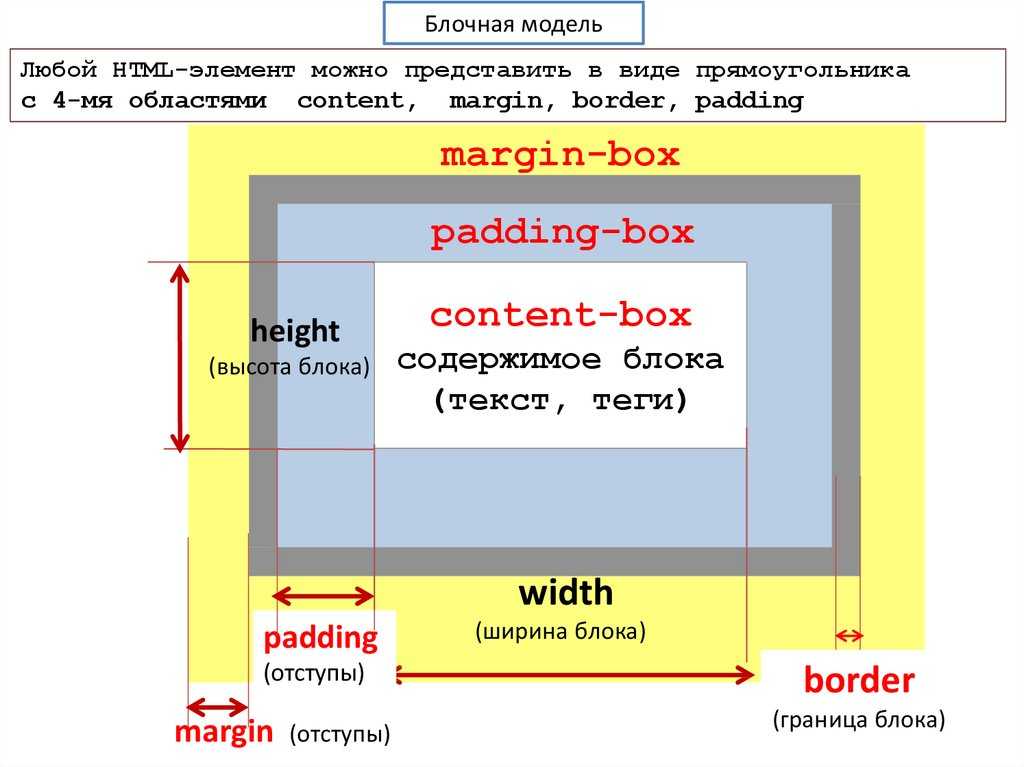
Как вы уже проверили в своей работе с HTML и CSS, текст внутри элемента выкладывается в поле содержимого элемента. Он начинается в левом верхнем углу области содержимого (или в правом верхнем углу, в случае содержимого языка RTL) и течёт к концу строки. Как только он достигает конца, он переходит к следующей строке и продолжает, затем к следующей строке, пока все содержимое не будет помещено в коробку. Текстовое содержимое эффективно ведёт себя как ряд встроенных элементов, размещённых на соседних строках и не создающих разрывы строк до тех пор, пока не будет достигнут конец строки, или если вы не принудите разрыв строки вручную с помощью элемента
Примечание: если приведённый выше абзац оставляет вас в замешательстве, то не имеет значения — вернитесь и просмотрите нашу статью о модели коробки, чтобы освежить теорию модели коробки, прежде чем продолжить.
Свойства CSS, используемые для стилизации текста, обычно делятся на две категории, которые мы рассмотрим отдельно в этой статье:
- Font styles: Свойства, влияющие на шрифт, применяемый к тексту, влияющие на то, какой шрифт применяется, насколько он велик, является ли он полужирным, курсивным и т. д.
- Text layout styles: Свойства, влияющие на интервал и другие особенности компоновки текста, позволяющие манипулировать, например, пространством между строками и буквами, а также тем, как текст выравнивается в поле содержимого.

Примечание: имейте в виду, что текст внутри элемента все затронуты как одна единая сущность. Вы не можете выбирать и стилизовать подразделы текста, если вы не обернёте их в соответствующий элемент (например, <span> или <strong>), или использовать текстовый псевдоэлемент, такой как ::first-letter (выделяет первую букву текста элемента),:: first-line (выделяет первую строку текста элемента) или ::selection (выделяет текст, выделенный в данный момент курсором.)
Давайте сразу перейдём к рассмотрению свойств для стилизации шрифтов. В этом примере мы применим некоторые различные свойства CSS к одному и тому же образцу HTML, который выглядит следующим образом:
<h2>Tommy the cat</h2> <p>Well I remember it as though it were a meal ago...</p> <p>Said Tommy the Cat as he reeled back to clear whatever foreign matter may have nestled its way into his mighty throat. Many a fat alley rat had met its demise while staring point blank down the cavernous barrel of this awesome prowling machine.Truly a wonder of nature this urban predator — Tommy the cat had many a story to tell. But it was a rare occasion such as this that he did.</p>
You can find the finished example on GitHub (see also the source code.)
Color
The color (en-US) property sets the color of the foreground content of the selected elements (which is usually the text, but can also include a couple of other things, such as an underline or overline placed on text using the text-decoration (en-US) property).
color can accept any CSS color unit, for example:
p {
  color: red;
}
This will cause the paragraphs to become red, rather than the standard browser default black, like so:
Font families
To set a different font on your text, you use the font-family property — this allows you to specify a font (or list of fonts) for the browser to apply to the selected elements. The browser will only apply a font if it is available on the machine the website is being accessed on; if not, it will just use a browser default font. A simple example looks like so:
p {
  font-family: arial;
}
This would make all paragraphs on a page adopt the arial font, which is found on any computer.
Web safe fonts
Speaking of font availability, there are only a certain number of fonts that are generally available across all systems and can therefore be used without much worry. These are the so-called
Most of the time, as web developers we want to have more specific control over the fonts used to display our text content. The problem is to find a way to know which font is available on the computer used to see our web pages. There is no way to know this in every case, but the web safe fonts are known to be available on nearly all instances of the most used operating systems (Windows, macOS, the most common Linux distributions, Android, and iOS).
The list of actual web safe fonts will change as operating systems evolve, but it’s reasonable to consider the following fonts web safe, at least for now (many of them have been popularized thanks to the Microsoft Core fonts for the Web initiative in the late 90s and early 2000s):
| Name | Generic type | Notes |
|---|---|---|
| Arial | sans-serif | It’s often considered best practice to also add Helvetica as a preferred alternative to Arial as, although their font faces are almost identical, Helvetica is considered to have a nicer shape, even if Arial is more broadly available. |
| Courier New | monospace | Some OSes have an alternative (possibly older) version of the Courier New font called Courier. It’s considered best practice to use both with Courier New as the preferred alternative. |
| Georgia | serif | |
| Times New Roman | serif | Some OSes have an alternative (possibly older) version of the |
| Trebuchet MS | sans-serif | You should be careful with using this font — it isn’t widely available on mobile OSes. |
| Verdana | sans-serif |
Note: Among various resources, the cssfontstack.com website maintains a list of web safe fonts available on Windows and macOS operating systems, which can help you make your decision about what you consider safe for your usage.
Note: There is a way to download a custom font along with a webpage, to allow you to customize your font usage in any way you want: web fonts. This is a little bit more complex, and we will be discussing this in a separate article later on in the module.
Default fonts
CSS defines five generic names for fonts: serif, sans-serif, monospace, cursive and fantasy. Those are very generic and the exact font face used when using those generic names is up to each browser and can vary for each operating system they are running on. It represents a worst case scenario where the browser will try to do its best to provide at least a font that looks appropriate. serif, sans-serif and monospace are quite predictable and should provide something reasonable. On the other hand, cursive and fantasy are less predictable and we recommend using them very carefully, testing as you go.
The five names are defined as follows:
Font stacks
Since you can’t guarantee the availability of the fonts you want to use on your webpages (even a web font could fail for some reason), you can supply a font stack so that the browser has multiple fonts it can choose from. This simply involves a font-family value consisting of multiple font names separated by commas, e.g.
p {
  font-family: "Trebuchet MS", Verdana, sans-serif;
}
In such a case, the browser starts at the beginning of the list and looks to see if that font is available on the machine. If it is, it applies that font to the selected elements. If not, it moves on to the next font, and so on.
It is a good idea to provide a suitable generic font name at the end of the stack so that if none of the listed fonts are available, the browser can at least provide something approximately suitable. To emphasise this point, paragraphs are given the browser’s default serif font if no other option is available — which is usually Times New Roman — this is no good for a sans-serif font!
Note: Font names that have more than one word — like Trebuchet MS — need to be surrounded by quotes, for example "Trebuchet MS".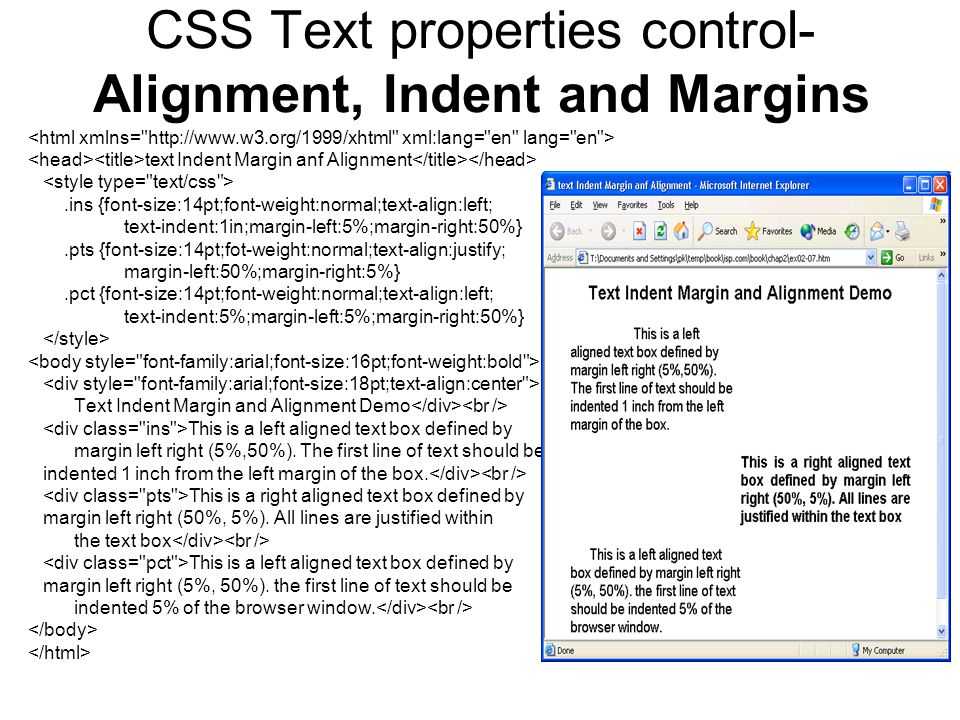
A font-family example
Let’s add to our previous example, giving the paragraphs a sans-serif font:
p {
  color: red;
  font-family: Helvetica, Arial, sans-serif;
}
This gives us the following result:
Font size
In our previous module’s CSS values and units article, we reviewed length and size units. Font size (set with the font-size property) can take values measured in most of these units (and others, such as percentages), however the most common units you’ll use to size text are:
px(pixels): The number of pixels high you want the text to be. This is an absolute unit — it results in the same final computed value for the font on the page in pretty much any situation.ems: 1emis equal to the font size set on the parent element of the current element we are styling (more specifically, the width of a capital letter M contained inside the parent element.) This can become tricky to work out if you have a lot of nested elements with different font sizes set, but it is doable, as you’ll see below. Why bother? It is quite natural once you get used to it, and you can use
 emto size everything, not just text. You can have an entire website sized usingem, which makes maintenance easy.rems: These work just likeem, except that 1remis equal to the font size set on the root element of the document (i.e.remis not supported in Internet Explorer 8 and below.
The font-size of an element is inherited from that element’s parent element. This all starts with the root element of the entire document — <html> — the font-size of which is set to 16px as standard across browsers. Any paragraph (or another element that doesn’t have a different size set by the browser) inside the root element will have a final size of 16 px.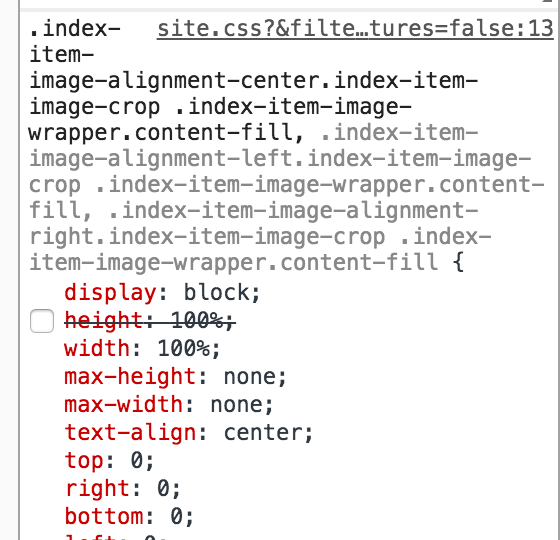 Other elements may have different default sizes, for example an
 <h2> (en-US) element has a size of 2 em set by default, so it will have a final size of 32 px.
Things become more tricky when you start altering the font size of nested elements. For example, if you had an <article> element in your page, and set its font-size to 1.5 em (which would compute to 24 px final size), and then wanted the paragraphs inside the <article> elements to have a computed font size of 20 px, what em value would you use?
<!-- document base font-size is 16px -->
<article> <!-- If my font-size is 1.5em -->
  <p>My paragraph</p> <!-- How do I compute to 20px font-size? -->
</article>
You would need to set its em value to 20/24, or 0.83333333 em. The maths can be complicated, so you need to be careful about how you style things. It is best to use
 rem where you can, to keep things simple, and avoid setting the font-size of container elements where possible.
A simple sizing example
When sizing your text, it is usually a good idea to set the base font-size of the document to 10 px, so that then the maths is a lot easier to work out — required (r)em values are then the pixel font size divided by 10, not 16. After doing that, you can easily size the different types of text in your document to what you want. It is a good idea to list all your font-size rulesets in a designated area in your stylesheet, so they are easy to find.
Our new result is like so:
html {
  font-size: 10px;
}
h2 {
  font-size: 5rem;
}
p {
  font-size: 1.5rem;
  color: red;
  font-family: Helvetica, Arial, sans-serif;
}
Font style, font weight, text transform, and text decoration
CSS provides four common properties to alter the visual weight/emphasis of text:
font-style: Used to turn italic text on and off. Possible values are as follows (you’ll rarely use this, unless you want to turn some italic styling off for some reason):
normal: Sets the text to the normal font (turns existing italics off.)italic: Sets the text to use the italic version of the font if available; if not available, it will simulate italics with oblique instead.oblique: Sets the text to use a simulated version of an italic font, created by slanting the normal version.
font-weight: Sets how bold the text is. This has many values available in case you have many font variants available (such as -light, -normal, -bold, -extrabold, -black, etc.), but realistically you’ll rarely use any of them except fornormalandbold:normal,bold: Normal and bold font weightlighter,bolder: Sets the current element’s boldness to be one step lighter or heavier than its parent element’s boldness.
100–900: Numeric boldness values that provide finer grained control than the above keywords, if needed.
text-transform(en-US): Allows you to set your font to be transformed. Values include:none: Prevents any transformation.uppercase: Transforms all text to capitals.lowercase: Transforms all text to lower case.capitalize: Transforms all words to have the first letter capitalized.full-width: Transforms all glyphs to be written inside a fixed-width square, similar to a monospace font, allowing aligning of e.g. Latin characters along with Asian language glyphs (like Chinese, Japanese, Korean).
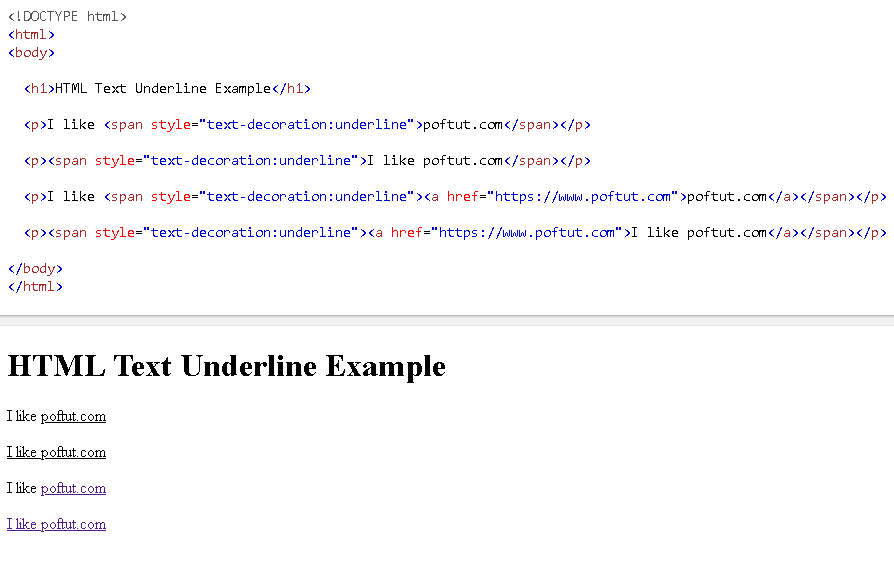
text-decoration(en-US): Sets/unsets text decorations on fonts (you’ll mainly use this to unset the default underline on links when styling them. ) Available values are:
none: Unsets any text decorations already present.underline: Underlines the text.overline: Gives the text an overline.line-through: Puts astrikethrough over the text.
text-decoration(en-US) can accept multiple values at once, if you want to add multiple decorations simultaneously, for exampletext-decoration: underline overline. Also note thattext-decoration(en-US) is a shorthand property fortext-decoration-line(en-US),text-decoration-style(en-US), andtext-decoration-color(en-US). You can use combinations of these property values to create interesting effects, for exampletext-decoration: line-through red wavy.
Let’s look at adding a couple of these properties to our example:
Our new result is like so:
html {
  font-size: 10px;
}
h2 {
  font-size: 5rem;
  text-transform: capitalize;
}
h2 + p {
  font-weight: bold;
}
p {
  font-size: 1. 5rem;
  color: red;
  font-family: Helvetica, Arial, sans-serif;
}
5rem;
color: red;
font-family: Helvetica, Arial, sans-serif;
}Text drop shadows
You can apply drop shadows to your text using the text-shadow property. This takes up to four values, as shown in the example below:
text-shadow: 4px 4px 5px red;
The four properties are as follows:
- The horizontal offset of the shadow from the original text — this can take most available CSS length and size units, but you’ll most commonly use
px; positive values move the shadow right, and negative values left. This value has to be included. - The vertical offset of the shadow from the original text; behaves basically just like the horizontal offset, except that it moves the shadow up/down, not left/right. This value has to be included.
- The blur radius — a higher value means the shadow is dispersed more widely. If this value is not included, it defaults to 0, which means no blur. This can take most available CSS length and size units.

- The base color of the shadow, which can take any CSS color unit. If not included, it defaults to
black.
Multiple shadows
You can apply multiple shadows to the same text by including multiple shadow values separated by commas, for example:
text-shadow: 1px 1px 1px red,
             2px 2px 1px red;
If we applied this to the <h2> (en-US) element in our Tommy the cat example, we’d end up with this:
Note: You can see more interesting examples of text-shadow usage in the Sitepoint article Moonlighting with CSS text-shadow.
With basic font properties out the way, let’s now have a look at properties we can use to affect text layout.
Text alignment
The text-align property is used to control how text is aligned within its containing content box. The available values are as follows, and work in pretty much the same way as they do in a regular word processor application:
left: Left-justifies the text.
right: Right-justifies the text.center: Centers the text.justify: Makes the text spread out, varying the gaps in between the words so that all lines of text are the same width. You need to use this carefully — it can look terrible, especially when applied to a paragraph with lots of long words in it. If you are going to use this, you should also think about using something else along with it, such ashyphens, to break some of the longer words across lines.
If we applied text-align: center; to the <h2> (en-US) in our example, we’d end up with this:
Line height
The line-height property sets the height of each line of text — this can take most length and size units, but can also take a unitless value, which acts as a multiplier and is generally considered the best option — the font-size is multiplied to get the line-height.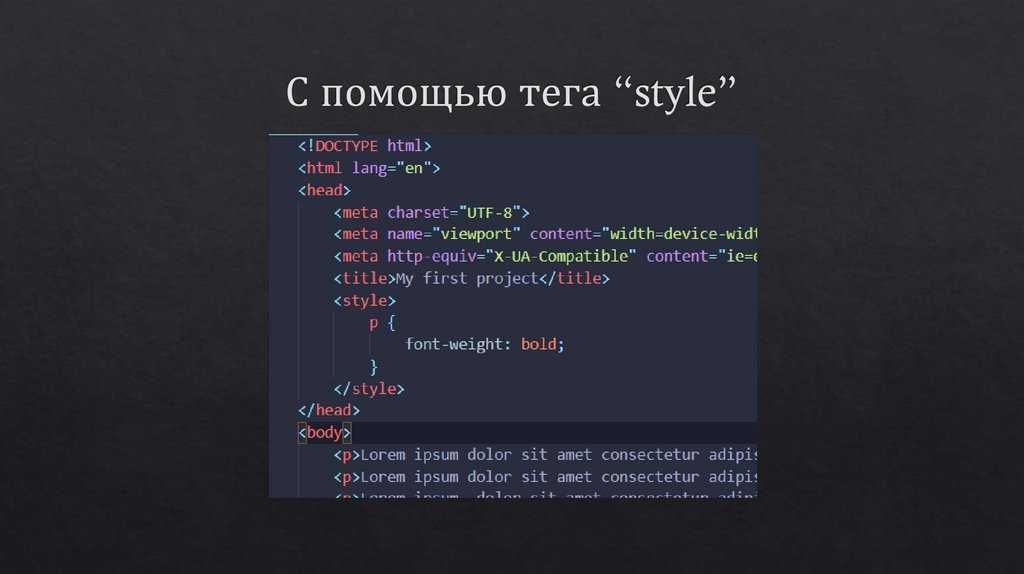 Body text generally looks nicer and is easier to read when the lines are spaced apart; the recommended line height is around 1.5 – 2 (double spaced.) So to set our lines of text to 1.6 times the height of the font, you’d use this:
line-height: 1.6;
Applying this to the <p> elements in our example would give us this result:
Letter and word spacing
The letter-spacing and word-spacing properties allow you to set the spacing between letters and words in your text. You won’t use these very often, but might find a use for them to get a certain look, or to improve the legibility of a particularly dense font. They can take most length and size units.
So as an example, we could apply some word- and letter-spacing to the first line of each <p> element in our example:
p::first-line {
  letter-spacing: 4px;
  word-spacing: 4px;
}
Let’s add some to our example, like so:
Other properties worth looking at
The above properties give you an idea of how to start styling text on a webpage, but there are many more properties you could use. We just wanted to cover the most important ones here. Once you’ve become used to using the above, you should also explore the following:
Font styles:
font-variant(en-US): Switch between small caps and normal font alternatives.font-kerning(en-US): Switch font kerning options on and off.font-feature-settings(en-US): Switch various OpenType font features on and off.font-variant-alternates(en-US): Control the use of alternate glyphs for a given font-face.font-variant-caps(en-US): Control the use of alternate capital glyphs.font-variant-east-asian(en-US): Control the usage of alternate glyphs for East Asian scripts, like Japanese and Chinese.font-variant-ligatures: Control which ligatures and contextual forms are used in text.
font-variant-numeric: Control the usage of alternate glyphs for numbers, fractions, and ordinal markers.font-variant-position(en-US): Control the usage of alternate glyphs of smaller sizes positioned as superscript or subscript.font-size-adjust(en-US): Adjust the visual size of the font independently of its actual font size.font-stretch(en-US): Switch between possible alternative stretched versions of a given font.text-underline-position(en-US): Specify the position of underlines set using thetext-decoration-linepropertyunderlinevalue.text-rendering(en-US): Try to perform some text rendering optimization.
Text layout styles:
text-indent: Specify how much horizontal space should be left before the beginning of the first line of the text content.
text-overflow(en-US): Define how overflowed content that is not displayed is signaled to users.white-space: Define how whitespace and associated line breaks inside the element are handled.word-break: Specify whether to break lines within words.direction: Define the text direction (This depends on the language and usually it’s better to let HTML handle that part as it is tied to the text content.)hyphens: Switch on and off hyphenation for supported languages.line-break: Relax or strengthen line breaking for Asian languages.text-align-last: Define how the last line of a block or a line, right before a forced line break, is aligned.text-orientation(en-US): Define the orientation of the text in a line.overflow-wrap: Specify whether or not the browser may break lines within words in order to prevent overflow.
writing-mode: Define whether lines of text are laid out horizontally or vertically and the direction in which subsequent lines flow.
Many font properties can also be set through the shorthand property font. These are written in the following order: font-style, font-variant (en-US), font-weight, font-stretch (en-US), font-size, line-height, and font-family.
Among all those properties, only font-size and font-family are required when using the font shorthand property.
A forward slash has to be put in between the font-size and line-height properties.
A full example would look like this:
font: italic normal bold normal 3em/1.5 Helvetica, Arial, sans-serif;
In this active learning session, we don’t have any specific exercises for you to do: we’d just like you to have a good play with some font/text layout properties, and see what you can produce! You can either do this using offline HTML/CSS files, or enter your code into the live editable example below.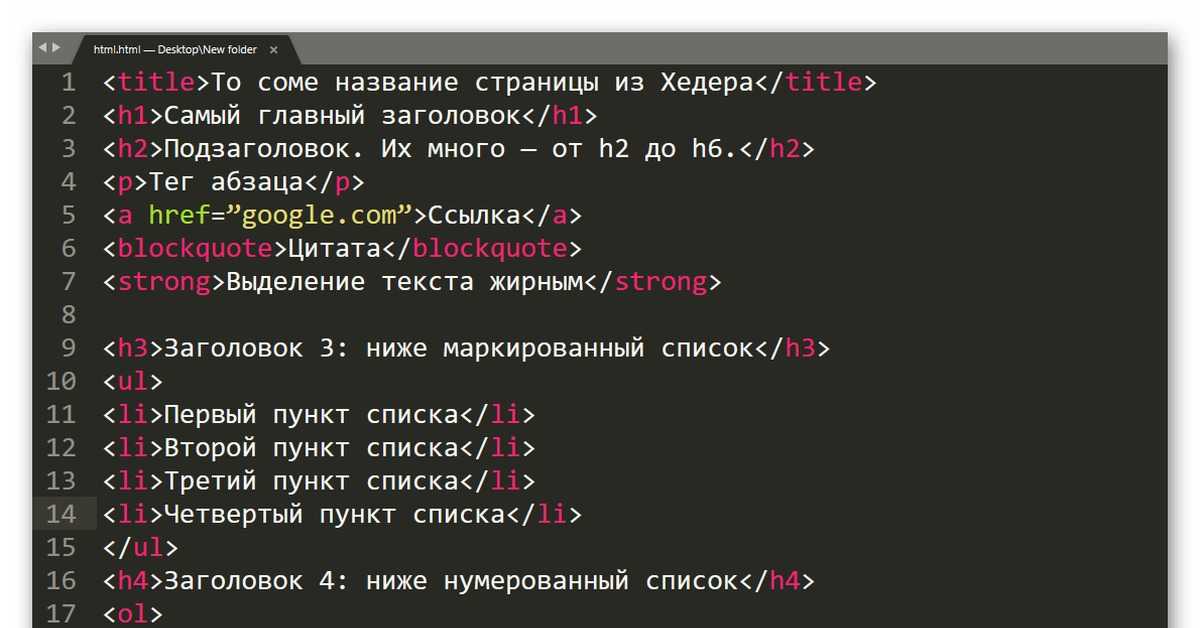
If you make a mistake, you can always reset it using the Reset button.
You’ve reached the end of this article, and already did some skill testing in our Active Learning section, but can you remember the most important information going forward? You can find an assessment to verify that you’ve retained this information at the end of the module — see Typesetting a community school homepage.
This assessment tests all the knowledge discussed in this module, so you might want to read the other articles before moving on to it.
We hoped you enjoyed playing with text in this article! The next article will give you all you need to know about styling HTML lists.
- Обзор: Styling text
- Далее
- Fundamental text and font styling
- Styling lists
- Styling links
- Web fonts
- Typesetting a community school homepage
Last modified: , by MDN contributors
Свойства текста | htmlbook.ru
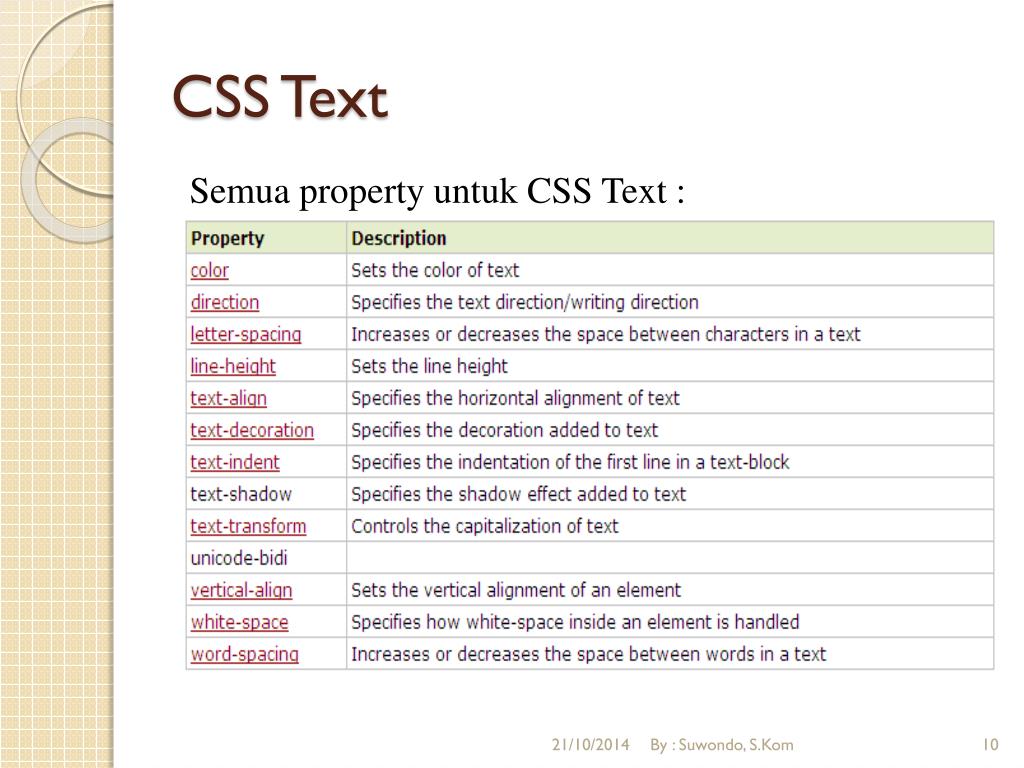
С помощью CSS можно определять стиль и вид текста. Аналогично тому, что используется тег <font>, задающий свойства шрифта, но стили обладают большими возможностями и позволяют сократить код HTML.
Свойства шрифта
Изменение начертания шрифта и его размера происходит через свойства CSS, которые описаны в табл. 1.
| Свойство | Значение | Описание | Пример |
|---|---|---|---|
| font-family | имя шрифта | Задает список шрифтов | P {font-family: Arial, serif} |
| font-style | normal italic oblique | Нормальный шрифт Курсив Наклонный шрифт | P {font-style: italic} |
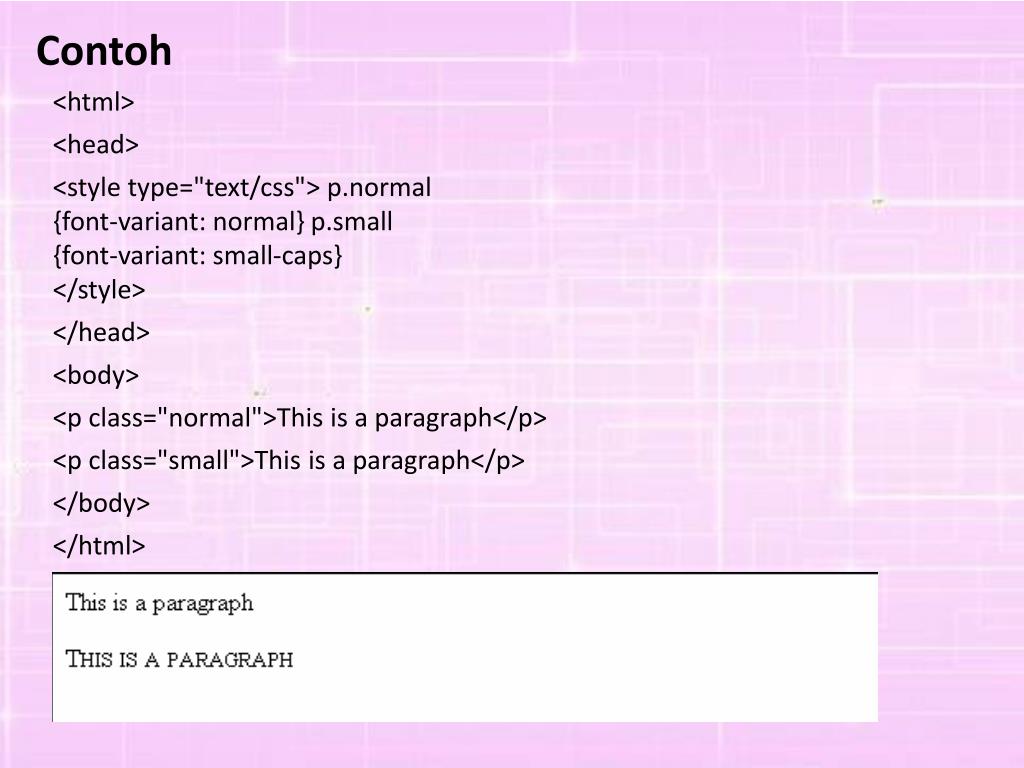
| font-variant | normal small-caps | Капитель (особые прописные буквы) | P {font-variant: small-caps} |
| font-weight | normal lighter bold bolder 100–900 | Нормальная жирность Светлое начертание Полужирный Жирный 100 — светлый шрифт, 900 — самый жирный | P {font-weight: bold} |
| font-size | normal pt px % | нормальный размер пункты пикселы проценты | font-size: normal font-size: 12pt font-size: 12px font-size: 120% |
В примере 1 показано использование параметров при работе со шрифтами.
Пример 1. Задание свойств шрифта с помощью CSS
<!DOCTYPE HTML PUBLIC "-//W3C//DTD HTML 4.01//EN" "http://www.w3.org/TR/html4/strict.dtd">
<html>
 <head>
  <meta http-equiv="Content-Type" content="text/html; charset=utf-8">
  <title>Шрифт</title>
  <style type="text/css">
   h2 {
    font-family: Arial, Helvetica, Verdana, sans-serif; /* Гарнитура шрифта */
    font-size: 150%; /* Размер текста */
    font-weight: lighter; /* Светлое начертание */
   }
  </style>
 </head>
 <body>
   <h2>Заголовок</h2>
  <p>Обычный текст</p>
 </body>
</html>
Ниже приведен результат данного примера (рис. 1).
Рис. 1. Вид текста после применения стилей
В табл. 2 приведены некоторые стилевые параметры для работы с текстом и результат их применения.
| Пример | Пример | Пример | Пример | Пример |
| font-family: Verdana, sans-serif; font-size: 120%; font-weight: light | font-size: large; font-weight: bold | font-family: Arial, sans-serif; font-size: x-small; font-weight: bold | font-variant: small-caps | font-style: italic; font-weight: bold |
Свойства текста
Кроме изменения параметров шрифтов, можно управлять и свойствами всего текста. Значения свойств приведены в табл. 3.
| Свойство | Значение | Описание | Пример |
|---|---|---|---|
| line-height | normal множитель значение % | Интерлиньяж (межстрочный интервал) | line-height: normal line-height: 1.5 line-height: 12px line-height: 120% |
| text-decoration | none underline overline line-through blink | Убрать все оформление Подчеркивание Линия над текстом Перечеркивание Мигание текста | text-decoration: none |
| text-transform | none capitalize uppercase lowercase | Убрать все эффекты Начинать С Прописных ВСЕ ПРОПИСНЫЕ все строчные | text-transform: capitalize |
| text-align | left right center justify | Выравнивание текста | text-align: justify |
| text-indent | значение % | Отступ первой строки | text-indent: 15px; text-indent: 10% |
Ниже, в табл.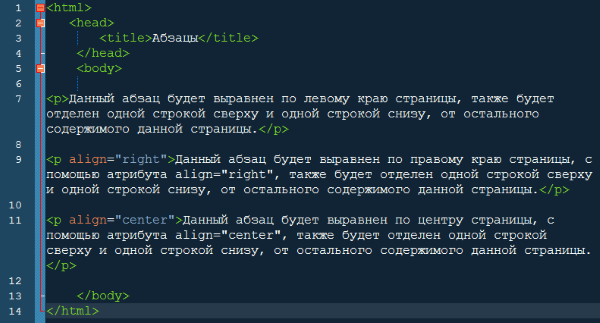 4 приведены некоторые параметры текста и результат их применения.
| Пример: и это все о нем | Пример: текст по центру | Пример: Это не ссылка, а просто текст | Пример: отступ первой строки | Пример: полуторный межстрочный интервал |
| text-transform: capitalize | text-align:center | text-decoration: underline | text-indent: 20px | line-height: 1.5 |
текст
CSS по теме
- font-family
- font-size
- font-style
- font-variant
- font-weight
- text-align
- text-decoration
- text-transform
Стили текста | Основы верстки контента
Зарегистрируйтесь для доступа к 15+ бесплатным курсам по программированию с тренажером
Создание страницы это, в первую очередь, работа с текстом. Каким бы ни был красивым дизайн, но если информацию прочитать трудно или невозможно, то пользователь быстро уйдет со страницы.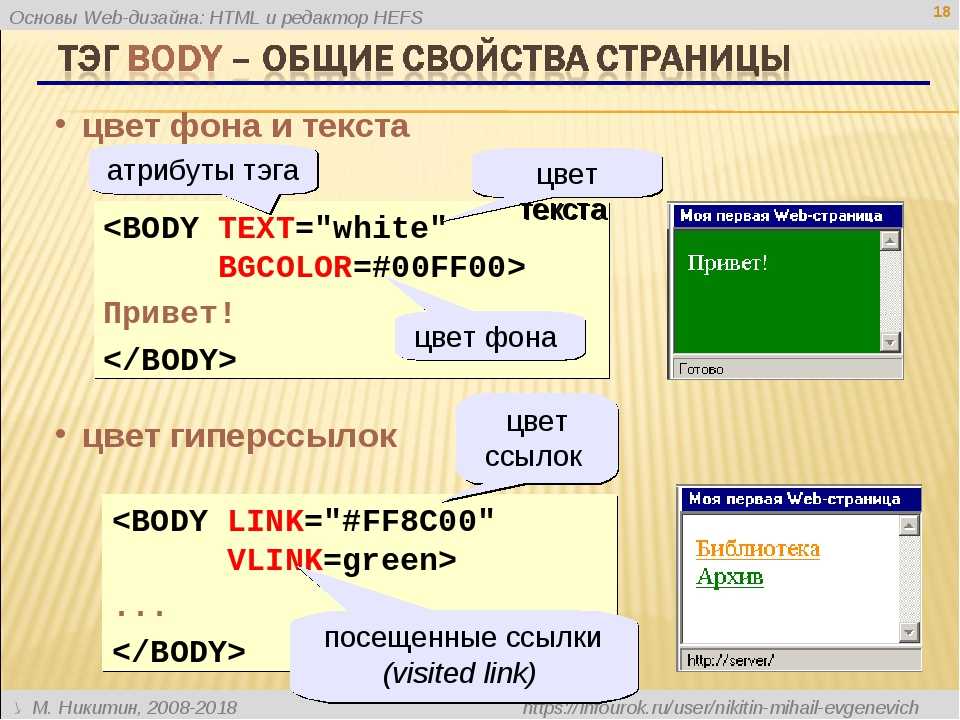 CSS дает широкие возможности для стилизации текста. В этом уроке рассмотрим основные стили, которые возможно применить к тексту. Описать их все в рамках одного урока невозможно и в этом нет необходимости. В процессе получения опыта вы будете узнавать о новых свойствах, но все они базируются на нескольких основных «китах»:
- Цвет текста;
- Расположение текста;
- Отступы от текста;
- Размер текста.
Цвет текста
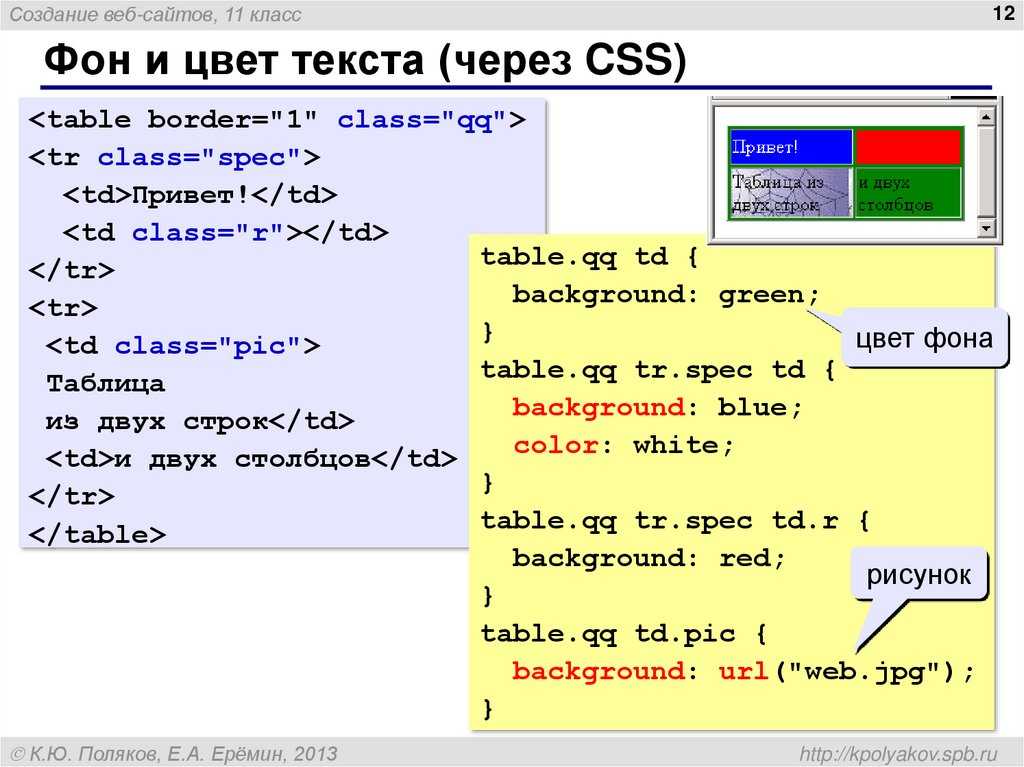
Каждый текст на странице имеет свой цвет. Будь то заголовки или кричащий баннер, который рассказывает о скидке. Любой текст имеет цвет. В CSS используется свойство color, чтобы управлять им. С его помощью можно установить любой цвет для разных участков текста. В качестве значения свойство принимает цвет в разных моделях цветового пространства. Распространенной является модель RGB. Она указывает, сколько красного, зеленого и синего используется в цвете. На первых порах вы можете использовать онлайн-сервисы, которые укажут выбранный цвет в этой модели.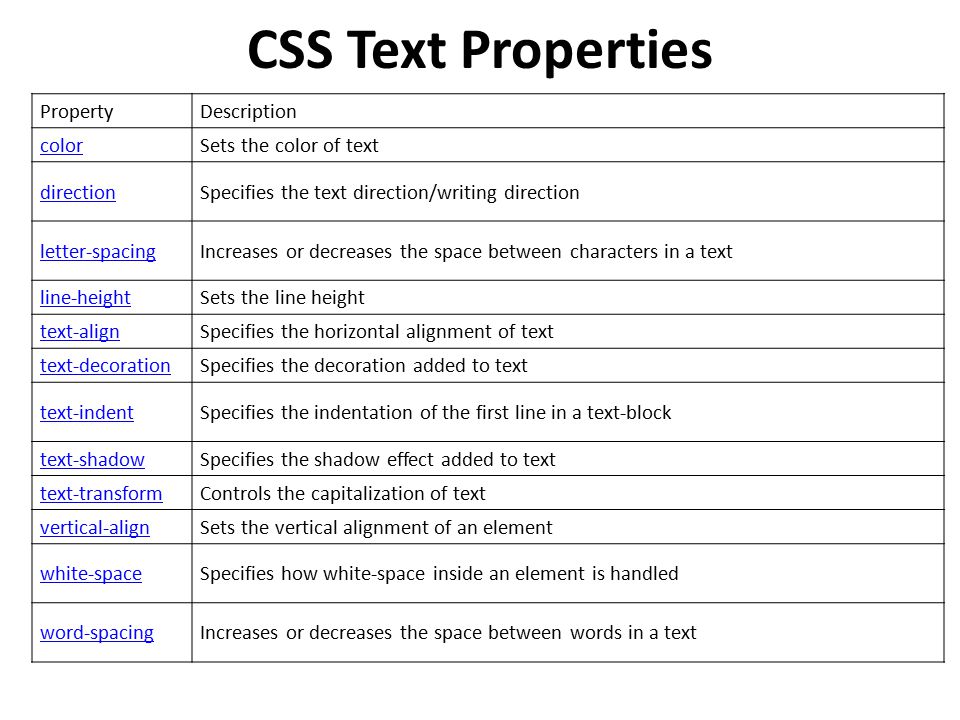 Одним из таких сервисов является HTML Colors Codes.
Первое, что настраивают разработчики во время верстки макета — цвет основного текста страницы. Так как свойство color является наследуемым, то его можно устанавливать для тега <html> или <body>. С помощью каскадности этот цвет будет применяться ко всему тексту, если не указано иного значения. Выберем неглубокий черный цвет, который записывается в модели RGB как #333333.
Интересно: в макетах редко встречается максимально черный цвет, который записывается как #000000. Дело в том, что такой цвет не встречается в природе и человеческому глазу непривычен
body {
  color: #333;
}
Установка цвета текста — непростая задача. Помимо решения дизайнерской задачи и согласования текста с остальными цветовыми решениями, необходимо не забывать про доступность текста. Какой бы цвет ни был выбран, его прочтение должно быть комфортным для пользователя.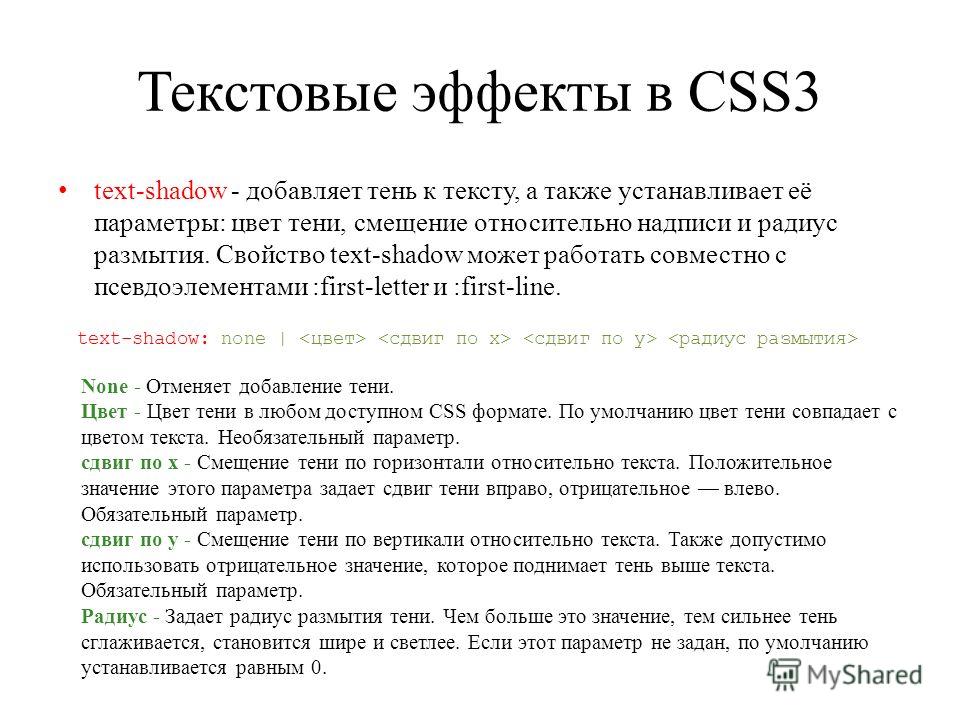 Для этого текст должен быть контрастным относительно фона, на котором он лежит. Светло-серый текст на белом фоне будет трудно прочитать. Поэтому на белом фоне используют черный или близкий к черному цвет для основного текста.
Контраст в меньшей степени относится к заголовкам и небольшим выделениям внутри текста. Они выделяются на общем фоне по другим характеристикам: насыщенность, размер, границы, самостоятельный фон. Такой текст тоже должен обладать достаточным контрастом, при этом он может иметь значения ниже, чем основной текст.
Для проверки контраста текста можно использовать веб-инспектор Chrome DevTools. Выбрав любой цвет на панели Styles браузер автоматически выведет коэффициент контраста текста. Он обозначен как Contrast ratio. Если контраст находится в рамках допустимого, то будет отмечен зеленой галочкой. В противном случае будет показан красный круг.
Выравнивание текста
Выравнивание текста является важным способом выделения текста на странице. Нестандартное выравнивание позволяет пользователю быстрее заметить текст. В связке с размером текста и цветом, выравнивание заголовков является общепризнанной практикой на страницах.
Для выравнивания текста используется свойство text-align, которое принимает следующие значения:
left— выравнивание текста по левому краю. Это значение устанавливается по умолчанию.center— выравнивание текста по центру.right— выравнивание текста по правому краю.justify— выравнивание текста по ширине. Данное значение выравнивает текст так, чтобы поместить слова строго от начала блока до его конца. При этом возможны изменения размеров пробелов между словами.
Важно: использование значения justify является плохой практикой. Данный прием используется в оформлении книг, где есть возможность отредактировать текст так, чтобы выравнивание по ширине не создавало больших пробелов между словами. В условиях веб-страницы такое почти невозможно.
Свойство text-align также является наследуемым. Установив его для какого-либо блока весь текст внутри него будет выровнен в соответствии со значением свойства.
Насыщенность текста
Используя CSS можно гибко настраивать насыщенность шрифта. Насыщенность используется для выделения важного участка текста и придает ему «вес» относительно соседних элементов. Для управления насыщенностью в CSS используется правило font-weight. Оно принимает следующие значения:
- Значения от 100 до 900 с шагом 100
lighter— сверхтонкое начертание. Делает текст менее насыщенным, чем текущее значениеnormal— значение по умолчанию. Соответствует числовому значению 400bold— жирное начертание текста. Соответствует числовому значению 700bolder— сверхжирное начертание. Делает текст насыщеннее, чем текущее значение
Для многих шрифтов доступны только значения normal и bold.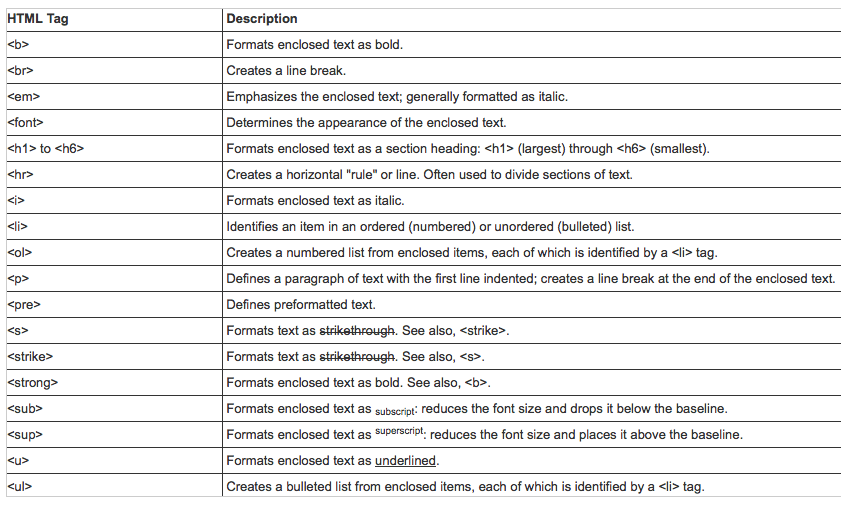 Это связано с тем, сколько создатели шрифта включат различных начертаний.
Размер текста
Управлять размером текста можно с помощью свойства font-size. Текст с большим размером шрифта первым бросается в глаза, поэтому заголовки, помимо выравнивания по центру, имеют больший размер шрифта.
Сравните заголовки, которые создаются с помощью тегов <h2></h2> и <h3></h3>. Основное их визуальное отличие — размер текста. Помимо встроенных стилей, мы можем самостоятельно устанавливать размер шрифта. Для этого можно использовать единицы измерения пиксели px. В следующих уроках вы узнаете и о других единицах измерения и как с их помощью можно адаптировать контент.
.small-text {
  font-size: 12px;
}
.normal-text {
  font-size: 16px;
}
.big-text {
  font-size: 30px;
}
текстовое оформление | CSS-Tricks — CSS-Tricks
Свойство text-decoration добавляет к выделенному тексту подчеркивание, надчеркивание, сквозную линию или комбинацию строк.
 ч4 {
  оформление текста: подчеркивание;
}
Значения
-
нет: линия не рисуется, и любое существующее украшение удаляется. -
underline: рисует линию толщиной 1 пиксель поперек текста на его базовой линии. -
line-through: рисует линию толщиной 1 пиксель поперек текста в его «средней» точке. -
overline: рисует линию толщиной 1 пиксель поперек текста, прямо над его «верхней» точкой. -
наследовать: наследует украшение родителя.
Значение blink есть в спецификации W3C, но оно устарело и не будет работать ни в одном из текущих браузеров. Когда это сработало, текст «мигал», быстро переключаясь между 0% и 100% непрозрачностью.
Демо
Замечания по использованию
Вы можете комбинировать подчеркивание , зачеркивание или строки через значения в списке, разделенном пробелами, для добавления нескольких декоративных строк:
 p {
  text-decoration: надчеркивание, подчеркивание, перечеркивание;
}
По умолчанию линия или линии наследуют цвет текста, заданный его свойством color . Вы можете изменить это в браузерах, которые поддерживают свойство
 text-decoration-color или сокращенное свойство с тремя значениями.
text-decoration как сокращенное свойство text-decoration можно использовать в сочетании с text-decoration-style и text-decoration-color в качестве сокращенного свойства:
 .fancy-underline {
  строка оформления текста: подчеркивание;
  стиль оформления текста: волнистый;
  цвет оформления текста: красный;

  /* можно сократить до */
  оформление текста: подчеркивание волнистым красным цветом;
}
В настоящее время только Firefox поддерживает это без префикса. Safari поддерживает его с префиксом -webkit . Chrome также нуждается в -префикс webkit и экспериментальные функции веб-платформы включены в флагах Chrome.
Поддержка браузера
Все браузеры поддерживают свойство CSS2.1 «longhand» text-decoration . Сокращенное свойство и подсвойства
 text-decoration-color , text-decoration-line и text-decoration-style поддерживаются без префикса в Firefox и с префиксом -webkit в Safari. Chrome также распознает эти значения с -префикс webkit и флаг экспериментальных веб-платформ включены.
Desktop
| Chrome | Firefox | IE | Edge | Safari |
|---|---|---|---|---|
| 109 | 107 | No | 106 | TP |
Mobile / Tablet
| Android Chrome | Android Firefox | Android | iOS Safari |
|---|---|---|---|
| 105 | 104 | 105 | 16,1* |
Подробнее
-
.в MDN текстовое оформление
цвет оформления текста
.element { text-decoration-color: оранжевый; } строка оформления текста
.element {строка-украшения-текста: подчеркивание; } текст-украшение-пропустить
.element { text-decoration-skip: ink; } текст-украшение-пропустить-чернила
.element {text-decoration-skip-ink: none; } стиль оформления текста
.element { стиль оформления текста: волнистый; } толщина оформления текста
.element {толщина украшения текста: 2px; } Использование CSS для управления выделением текста / Coder’s Block
CSS позволяет управлять поведением выделения текста и его отображением на страницах. Это может помочь вам улучшить удобство использования в определенных ситуациях и добавить немного визуального чутья.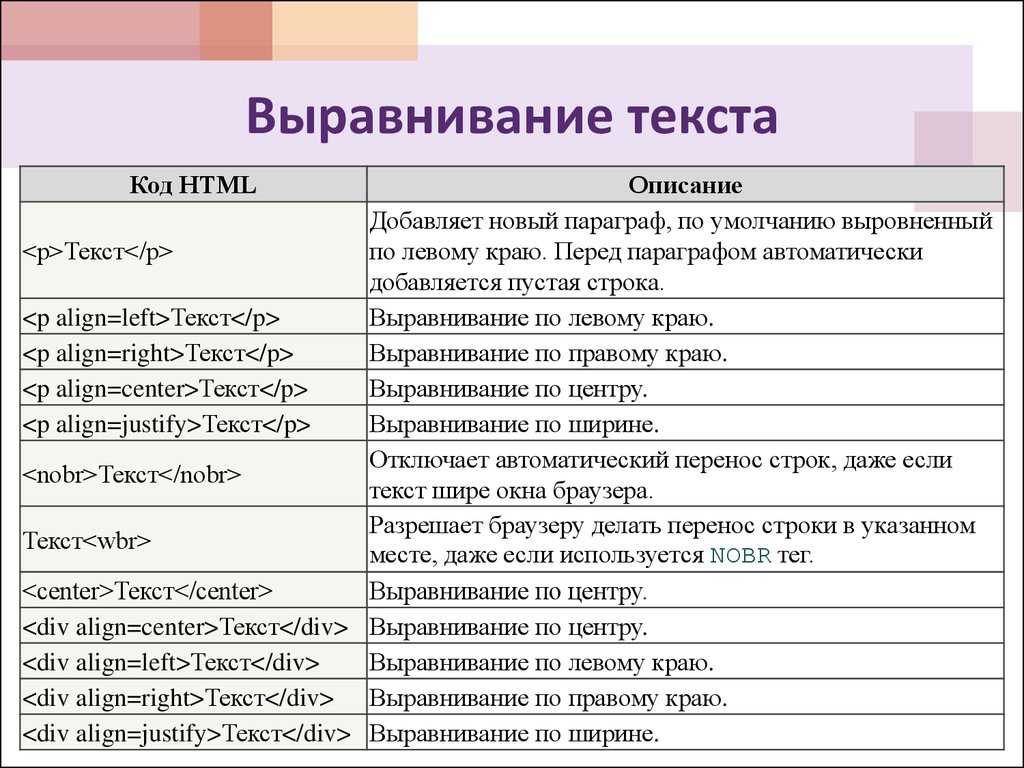 Давайте погрузимся!
Иногда удобно, чтобы весь текст в элементе автоматически выделялся при нажатии на него. Это особенно удобно для текста, который копируется/вставляется целиком (фрагменты кода, одноразовые пароли, промокоды и т. д.).
Этого можно добиться с помощью простого CSS. JavaScript не требуется!
 div {
 -webkit-user-select: all; /* для Safari */
 выбор пользователя: все;
 }
Вот демонстрация. Плохая новость, это не работает на iOS. Хорошие новости, он изящно деградирует, поэтому текст все еще можно выделить.
См. Pen Select All от Уилла Бойда (@lonekorean) на CodePen.
Хотя это работает, как и ожидалось, вы можете заметить кое-что раздражающее: невозможно выбрать что-то меньшее, чем весь фрагмент кода. Было бы неплохо, если бы первый щелчок выделял все, но вы все равно могли бы щелкнуть еще раз и выбрать только часть? CSS может это сделать.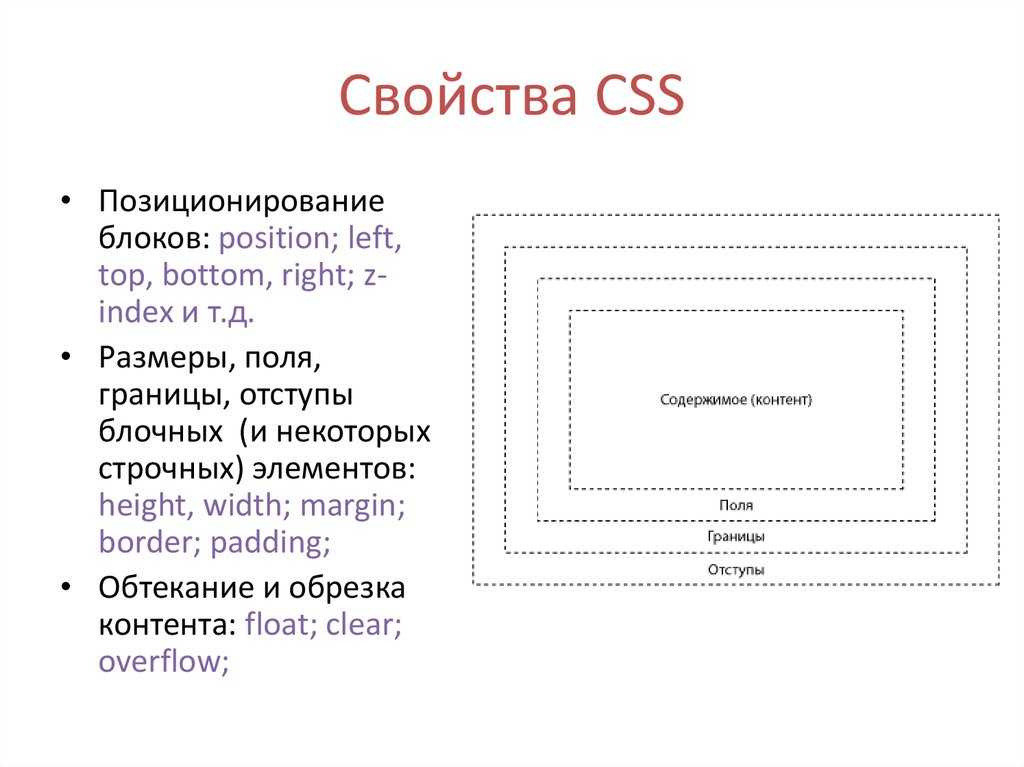
Сначала используйте tabindex , чтобы сделать элемент, содержащий текст, доступным для фокуса. Это дает CSS способ узнать, когда элемент был нажат.
здесь находится фрагмент кода Затем идет CSS.
 код {
 -webkit-user-select: all;
 выбор пользователя: все;
 }  code:focus {
 анимация: выберите шаг вперед на 100 мс;
 }   @keyframes select {
 to {
 -webkit-user-select: text;
 выбор пользователя: текст;
 }
 }
Идея состоит в том, чтобы иметь выбор пользователя: сначала все на элементе, а затем переключиться на «обычный» выбор пользователя: текст после того, как элемент получит фокус, чтобы текст мог свободно пересматриваться. -выбрано. Сложная часть — это время. Выполните переключение сразу после фокуса и пользовательского выбора: все исчезнут, прежде чем они смогут выполнить свою работу. Вот тут-то и появляется анимация .
Да, по выбору пользователя можно анимировать! Точнее, это дискретно можно анимировать, что означает отсутствие постепенной интерполированной анимации, а скорее немедленный переход от одного состояния к другому. Вооружившись этими знаниями, мы можем использовать анимацию , чтобы отложить изменение поведения выбора до 100 мс после фокуса. Идеальный.
Опять же, бит «выбрать все» не работает на iOS. Между тем, настольный Safari сохраняет текст как «выбрать все». Этот трюк, похоже, отлично работает в других местах.
См. Pen Select All… Then Select Some by Will Boyd (@lonekorean) на CodePen.
Вы также можете использовать CSS, чтобы сделать текст в элементе недоступным для выбора.
 метка {
 -webkit-user-select: нет;
 выбор пользователя: нет;
 }
Вероятно, это плохая идея для основного текста, но я нашел ее полезной для элементов управления, которые могут быстро переключаться или «ярко щелкать» в настольных браузерах, поскольку двойной щелчок приводит к выделению и выделению текста, что может выглядеть немного странно иногда.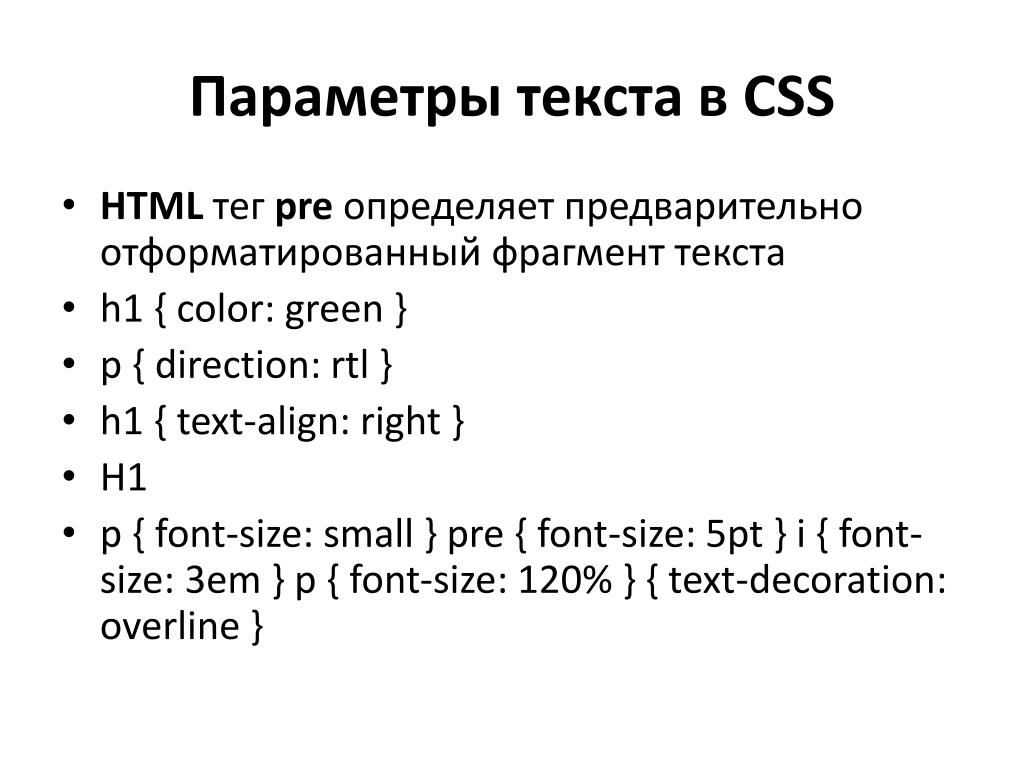
Убедитесь сами в следующей демонстрации. Обратите внимание, как переключатель слева подсвечивается при быстром нажатии, а переключатель справа — нет.
См. статью Уилл Бойд (@lonekorean) на CodePen, предотвращающая выделение текста от ярости.
Этот метод также работает с виджетами раскрытия. Поддельные кнопки — например, Текст, который невозможно выделить, можно смешать с доступным для выбора текстом. Невыбираемые биты просто пропускаются при выделении текста и будут опущены при копировании/вставке выделения. В приведенной ниже демонстрации используется См. «Перо, объявляющее биты невыбираемого текста» Уилла Бойда (@lonekorean) на CodePen. К сожалению, некоторые браузеры не работают. Safari (iOS и рабочий стол) и Android Chrome по-прежнему будут копировать маркеры. Вы можете стилизовать выделение текста, нацелившись на псевдоэлемент Вот пример оформления выделенного текста в виде Попробуйте выделить текст в приведенной ниже демонстрации, чтобы увидеть результат. См. «Выделение текста с помощью пера» Уилла Бойда (@lonekorean) на CodePen. Есть еще одно объявление, click — еще один кандидат. Имейте в виду, что использование настоящего предпочтительнее не только из-за семантики и доступности, но и потому, что текст в по умолчанию не может быть выбран, что позволяет избежать проблемы с самого начала.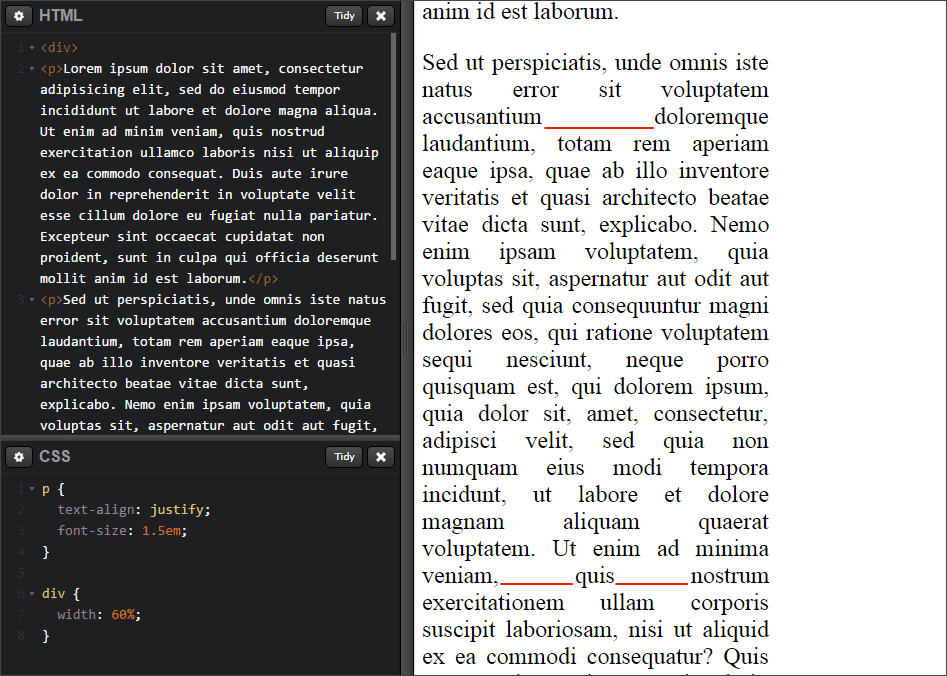
user-select: none для числовых маркеров сносок. Поэтому, когда вы копируете/вставляете, маркеры автоматически удаляются для вас. ::selection . Однако ваши варианты ограничены тремя свойствами: color , background-color и text-shadow (в спецификации определено больше, но браузеры их не поддерживают). p::selection {
color: #fffaa5;
цвет фона: #f38630;
тень текста: 2px 2px #31808c;
}  К сожалению, iOS снова не справляется, но все остальные должны увидеть более причудливые цвета.
 user-select: contains , которое должно ограничивать выделение текста внутри элемента, как вы видели бы с


 Truly a wonder of nature this urban
predator — Tommy the cat had many a story to tell. But it was a rare
occasion such as this that he did.</p>
 Why bother? It is quite natural once you get used to it, and you can use
  Possible values are as follows (you’ll rarely use this, unless you want to turn some italic styling off for some reason):
 ) Available values are:
 5rem;
color: red;
font-family: Helvetica, Arial, sans-serif;
}


 текстовое оформление